
Rocky Valley Track Guide: Asphalt Legends Gauntlet (Scotland)
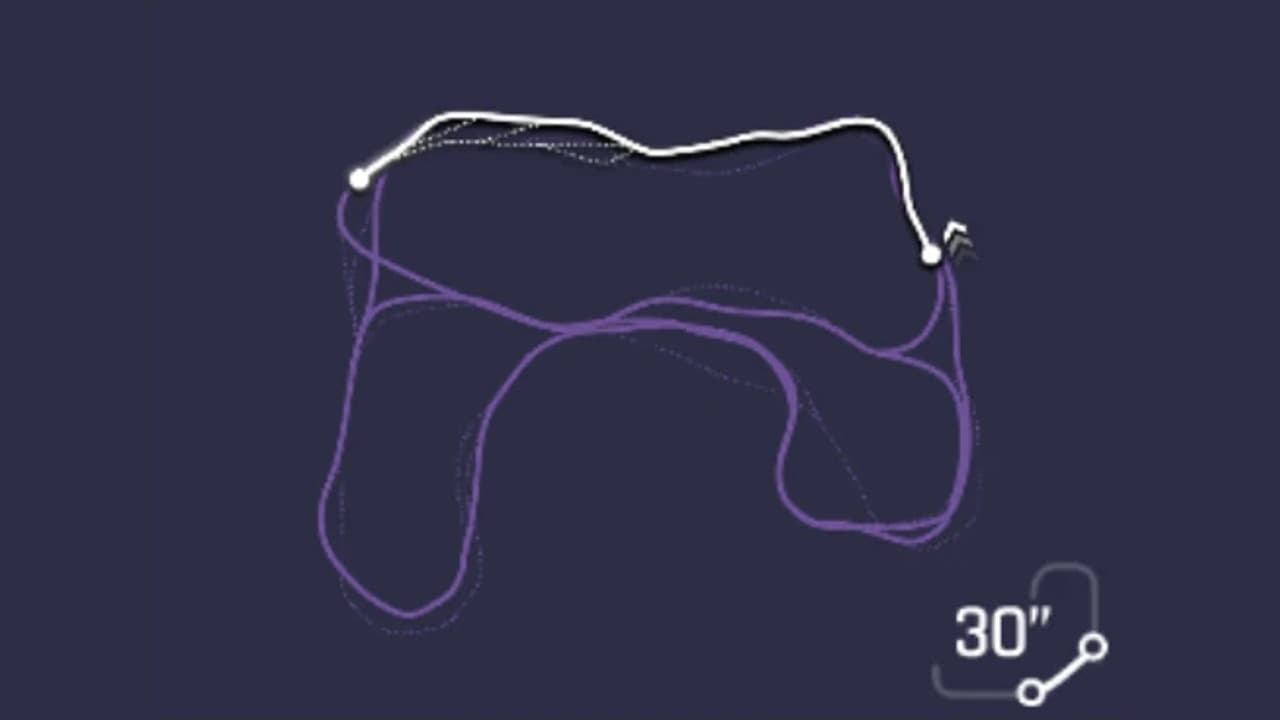 1 Hazard: Standing start on the tarmac and the gravel climb2 Drift: The 75-metre drift at the top of the climb3 Nitro: The shockwave at 25% that sets the takeoff speed4 Ramp: The cliff-edge leap and the second hop5 Ramp: The 2.86-second ramp through the wind turbines6 Nitro: The landing hop and the coasting run to the line
- 1. Standing start on the tarmac and the gravel climb
- 2. The 75-metre drift at the top of the climb
- 3. The shockwave at 25% that sets the takeoff speed
- 4. The cliff-edge leap and the second hop
- 5. The 2.86-second ramp through the wind turbines
- 6. The landing hop and the coasting run to the line
What this track demands
Roughly a third of the lap is spent airborne across three leaps and a hop, and the speed the car carries off each ramp is the speed the game holds for the whole flight. What decides it is firing the shockwave at 25% so the car leaves the cliff at 409 km/h, and landing the turbine ramp straight enough to fire the second shockwave the moment the wheels touch.
- Air and stunts
- 5
- Acceleration
- 4
- Nitro
- 4
- Top speed
- 3
- Handling
- 2
- Drift
- 2
The 30 seconds, beat by beat
The standing start on the tarmac and the gravel climb
Standing start on the tarmac and the gravel climb
Rocky Valley launches from a dead stop on a strip of tarmac with a yellow centre line, heading uphill into a left curve. The reference run reads 44 km/h six tenths of a second in with 0% of the track behind it, 108 km/h at 1% and 163 km/h at 3%, and by 4% the road has turned to gravel. It winds between rock walls from 8% to 10%, where the run reads 213 and 228 km/h, and opens into a straight that climbs to 283 km/h at 15% and 288 km/h at 16%. Nothing here needs more than small steering inputs; the launch sets the speed the car carries into the only real corner on the lap.
The 75-metre drift at the top of the climb
The 75-metre drift at the top of the climb
At 16% the gravel bends left around a cliff face lined with red barriers, and the reference run starts its drift at 288 km/h. The counter reads 22 metres at 17%, 40 metres at 19%, 67 metres at 20% and 75 metres at 21%, where the slide ends with the car reading 265 km/h. The lowest point is 262 km/h at 20%, so the corner costs the run 26 km/h and about a second of the clock, from 6.6 to 7.6 seconds. It also fills the nitro bar, which is the point: this is the last chance to bank nitro before the shockwave that launches the car off the cliff.
The shockwave at 25% that sets the takeoff speed
The shockwave at 25% that sets the takeoff speed
Out of the drift the road straightens and the reference run accelerates on its own to 283 km/h at 23%, then fires a nitro shockwave at 25% reading 298 km/h. The next five percent are the fastest gain on the lap: 315 km/h at 26%, 339 at 27%, 360 at 28%, 381 at 29% and 400 km/h at 30%, with 409 km/h on the HUD at 32%. The clock reads 8.4 seconds when the shockwave fires and 10.0 when the road ends, so the whole sprint lasts a second and a half. The number the car shows at 32% is the number it keeps for the flight that follows.
The cliff-edge leap and the second hop
The cliff-edge leap and the second hop
At 32% the gravel ends at a cliff edge and the car is airborne over a lake with standing stones on the far side. The game reads it faster the longer it flies: 413 km/h at 34%, 430 at 36% as the first barrel roll registers, 486 at 39%, 520 at 40% and 556 km/h at 42% with a second barrel roll. The air time stops at 1.89 seconds and the run touches down around 43% reading 524 km/h, between purple Gauntlet banners. A short straight follows, 552 km/h at 45%, then the road drops away again at 46% for a second hop of 1.22 seconds that lands at 54% reading 578 km/h and awards a perfect run.
The 2.86-second ramp through the wind turbines
The 2.86-second ramp through the wind turbines
A red-and-white ramp sits across the road at 57%, and the reference run hits it at 562 km/h with a 19-metre correction drift just before it. What follows is the longest single moment on the lap: 565 km/h at 60%, 580 at 62% as the first 360 registers, then 582 km/h held flat from 64% to 74% while the car spins through four 360s between the turbine blades with the valley and its heather below. The clock reads 14.1 seconds at takeoff and 16.85 at the landing, 2.86 seconds in the air covering about 18% of the track. The run comes down at 76% reading 459 km/h and fires its second shockwave the moment it lands.
The landing hop and the coasting run to the line
The landing hop and the coasting run to the line
The shockwave on landing takes the run from 459 km/h at 76% to 468 at 77%, 531 at 79% and 568 km/h at 80%, and a small hop at 79% keeps it airborne for 0.63 seconds over a rise with a stone viaduct in the background, reading 582 km/h at 82%. From the landing at 84% the lap is a coast: 573 km/h at 84%, 550 at 87%, 514 at 90%, 493 at 93% and 478 km/h at 96% as the run passes the Asphalt barriers and the FINISH banner. A perfect nitro fires at 98%, too late to change much, and the car crosses the line reading 469 km/h with 20.633 on the clock.
Where the run is won
- The shockwave at 25%. The reference run fires it at 298 km/h and reads 409 km/h when it leaves the cliff seven tenths of a second later, and the game holds that takeoff speed through a 1.89-second flight. Every km/h missing at 32% is missing from the whole leap.
- The turbine ramp at 57%. The run hits it at 562 km/h, holds 582 km/h for 2.86 seconds in the air, and lands at 459 km/h. A landing straight enough to fire the second shockwave on touchdown is what gets the car back to 582 km/h by 82%; a crooked one leaves it coasting from 459.
What wrecks a run
- Over-rotating the drift at 17%. The reference run slides 75 metres and loses 26 km/h, from 288 to 262. Holding the slide past the exit lowers the 298 km/h the shockwave fires from at 25%, and that number sets the takeoff speed for the cliff leap.
- Firing nitro during the drift. The run waits until 25%, two percent after the slide ends, with the bar full and the car already back to 283 km/h. Burning it mid-corner spends the same bar at 265 km/h and arrives at the cliff slower.
- Landing the turbine ramp crooked. The run touches down at 76% reading 459 km/h and fires the shockwave on the spot, which is why it reads 582 km/h again by 82%. Land sideways and the shockwave fires late or not at all, and the car coasts the last quarter from 459 instead of 582.
- Coasting the finish. From 84% to the line the reference run falls from 573 km/h to 469 km/h with nitro still in the bar, and only fires a perfect nitro at 98%. That last fifth of the lap is where a run with nitro left can still find time.
Which car to bring
Read this track the way our car stats guide suggests: count the places the layout forces you to slow down, then look at what it gives you back. Rocky Valley forces it twice (the standing start and the 75-metre drift) and in return hands you three leaps and a hop that between them keep the car airborne for about seven of the lap's twenty seconds, with the HUD reading 582 km/h for most of that whatever the car's top speed rating says.
In priority order: nitro, because the two shockwaves at 25% and 76% are the moments that set the speed the car carries into and out of the two big flights, and a car with a fast-filling bar fires both sooner. Acceleration next, for the standing start and the climb from 44 km/h to 288 km/h in the first 16%, and for the recovery from 262 km/h after the drift. Air third, meaning a car that lands stable and straight: the turbine ramp lands at 459 km/h and the whole last quarter depends on firing nitro the instant the wheels touch. Top speed matters less than it looks, because the game reads the car at 582 km/h in the air regardless, and on the ground the run only reaches 409 km/h before the first leap. Handling and drift matter least, with one real corner on the lap.
The cited runs are the clearest evidence for that ordering. The fastest lap we found, 19.933 in a Car Evolution Ferrari SF90 Stradale, is seven tenths clear of the Chiron run this guide was read from, and the uploader of a reference compilation for this track lists a Rimac Nevera Time Attack and a Rimac Nevera at identical 21.299 laps and a Chiron and a Tuatara at identical 21.466 laps. On a lap that is a third airborne, the spread between hypercars is small and the nitro timing is what separates them.
One consequence worth being straight about. Your Gauntlet division is set by the combined rank of your top five cars, and rank leans heavily on top speed, so a car that suits this track does not have to push your division up. The times attached to some picks are laps other players have posted, included so you can tell whether your own run is close. They are not targets, and none of them is a time we set.
Hyundai IONIQ 5 N
StarterClass D · Gauntlet Market, Division I
The cheapest car in the Gauntlet Market and the usual way into the mode at all. Its low rank keeps your division down, and its electric acceleration covers the standing start and the climb, which is the one part of this lap where a slow car is truly exposed. The leaps work the same at any class: the HUD reads the car at its flight speed whatever it is rated at, so a Class D car loses most of its time on the ground between 0% and 32%.
Aston Martin DBS 770 Ultimate
StarterClass B · Gauntlet Market, Division II (900 blueprints)
The cheaper of the Division II market cars and a sensible first blueprint target if you are past the IONIQ. On this track the step up buys a quicker climb to the drift and a faster recovery out of it, which is where a Class B car pulls a gap on a Class D one. Learn where the drift starts at 16% and where the cliff edge comes at 32% in it before spending on anything faster.
Lamborghini SC18
MidClass A · Gauntlet Market, Division III (2,100 blueprints)
A lot of nitro for a Class A car, which matters here because the two shockwaves at 25% and 76% are the moments that decide the lap. A car that refills through the 75-metre drift fires the first shockwave earlier, and one that has nitro in hand on the turbine landing fires the second on touchdown. The right mid-tier car for learning the lap.
FV Frangivento Sorpasso GT3
MidClass S · Gauntlet Market, Division IV (2,200 blueprints)
The cheaper of the two blueprint cars in the Division IV market, and the step where the climb from the standing start stops being a handicap. A reasonable target if you are grinding Gauntlet currency and want a Class S launch without saving for the Division V roster, on a track where the ground speed only matters for the first third.
BMW 3.0 CSL Hommage
HighReference run: 21.599 — Allen Chou reference run
The slowest of the cited runs, a second behind the Chiron lap this guide was read from. A concept car with a lower ceiling than the hypercars above it, and on a lap where the ground speed only reaches 409 km/h before the first leap, that gap is smaller than it would be on a straight-line track. A good illustration of how much of this lap is decided in the air.
Rimac Nevera
HighReference run: 21.199 — Sasugafubu reference run
An electric hypercar with instant acceleration off the standing start, which covers the one part of this lap where the car is on the ground and gaining speed. The cited run is half a second behind the Chiron, and the uploader of a reference compilation for this track lists the Nevera and the Nevera Time Attack at identical 21.299 laps, which says the time on this track is in the nitro timing rather than the car.
Bugatti Chiron
HighRank 5,205 in the cited run · Not sold in the Gauntlet Market
Reference run: 20.633 — Fohgont reference run
The car this entire guide was read from, run as a Car Evolution build with a Heavycore Shockwave nitro system and a drift nitro intake, as shown on the garage screen at the start of the video. The run shows exactly where that pays: a shockwave at 25% that takes it from 298 to 409 km/h before the cliff, and a second on the turbine landing that recovers it from 459 to 582 km/h by 82%. The same car posts 21.458 and 21.499 in other players' hands, so the seven tenths between those and this lap is driving, not hardware.
Ferrari SF90 Stradale
HighCar Evolution build in the cited run
Reference run: 19.933 — frag_ reference run
The fastest lap we found on this track, seven tenths clear of the Chiron run, in a Car Evolution build. A plug-in hybrid with electric torque off the line and a strong nitro, which is the whole profile this layout rewards: a quick climb to the drift, a shockwave that sends the car off the cliff fast, and a second shockwave on the turbine landing. The uploader's own note says all laps are improvable.
These are examples of the profile, not a ranked list. The method behind them is in how Asphalt Legends car stats actually work.
Frequently Asked Questions
- How long is Rocky Valley in Asphalt Legends?
- It is one of the two 30-second (30") Scotland variations used in Gauntlet, alongside Ghost Ships. The reference runs we cite finish it in 19.933 to 21.599 seconds, and about a third of that lap is spent in the air.
- Where is Rocky Valley won and lost?
- At the two shockwaves. The first, at 25%, takes the reference run from 298 km/h to 409 km/h in the five percent before the cliff edge, and the game holds that speed through the 1.89-second leap. The second fires on the turbine landing at 76% and recovers the car from 459 km/h to 582 km/h by 82%. A run that fires either late is slower for the whole stretch that follows.
- What kind of car is best for Rocky Valley?
- Nitro first, acceleration second, a stable landing third. Only the first third of the lap is driven on the ground, and the reference car reaches 409 km/h there before the first leap, so a high top speed matters less than a fast-filling nitro bar and a quick climb from the standing start. The fastest cited lap was set in a Car Evolution Ferrari SF90 Stradale.
- How many jumps are there on Rocky Valley?
- Three leaps and a hop in the reference run: 1.89 seconds off the cliff at 32% with two barrel rolls, 1.22 seconds from 46% with a perfect landing, 2.86 seconds off the turbine ramp at 57% with four 360s, and 0.63 seconds over a rise at 79%. Together they cover roughly 40% of the track distance.
- How long is the big jump on Rocky Valley?
- The reference run leaves the ramp at 57% with the clock reading 14.1 seconds and lands at 76% with the clock at 16.85, so 2.86 seconds in the air covering about 18% of the track. The HUD reads 582 km/h from 64% to 74% while the car spins through four 360s between the wind turbines.
- How many drifts are there on Rocky Valley?
- One that matters: a 75-metre slide from 16% to 21% around the left-hander at the top of the climb, which takes the reference car from 288 km/h to 262 km/h. There is a 19-metre correction before the turbine ramp and a few 3-metre and 4-metre twitches on the run to the line, none of which cost anything.
- Can you get a good time on Rocky Valley with an earnable car?
- The Gauntlet Market ladder is the route: the Hyundai IONIQ 5 N at Division I, the Aston Martin DBS 770 Ultimate at Division II, the Lamborghini SC18 at Division III and the FV Frangivento Sorpasso GT3 at Division IV. On this track each rung buys a quicker climb to the drift and a faster-filling nitro bar, and the flights themselves read the same speed at any class.
Sources
- Asphalt Wiki - Scotland (track variants and route maps)
- Asphalt Wiki - Gauntlet (format, divisions, Gauntlet Market)
- Reference run - Bugatti Chiron, 20.633 (Fohgont)
- Reference run - Ferrari SF90 Stradale (Car Evolution), 19.933 (frag_)
- Reference runs - Rocky Valley and Ghost Ships references (frag_)
- Reference run - Rimac Nevera, 21.199 (Sasugafubu)
- Reference run - BMW 3.0 CSL Hommage, 21.599 (Allen Chou)
- Reference run - Bugatti Chiron, 21.458 (Bl1zzard)
- Reference run - Bugatti Chiron, 21.499 (QuanTheAznPoop)